
To Mask Or Not To Mask
What a crazy time we find ourselves living in! I created this mask pattern a while back to be used during high pollen seasons. I’ve struggled with making it available because on it’s own it would not be effective protection against the spread of viruses, and I don’t want anyone to misunderstand or misuse its intent. I have added lining instructions to the original pattern in case you do plan to use it during this current pandemic season. Click on the button below to read mask recommendations directly from the CDC website.

Disclaimer: This knitted mask is intended for use during high pollen count seasons when seasonal allergies flare up. The finished mask is not intended for use by medical professionals and cannot take the place of handwashing and social distancing to prevent the spread of viruses. This mask has not been tested for efficacy in preventing the spread of viruses. I strongly recommend lining the mask (see instructions below) to be compliant with CDC guidelines. Please wear this mask at your own risk. Keep well and keep knitting, friends!
Yarn Chasing Rabbits Fiber Co. Fern 85% Superwash Merino / 15% Nylon, fingering weight. Approximately 15g or about 70 yd.
Definitions
Garter Stitch - Knit on both sides of work.
-K - Knit
-Kf/b - Knit into the front of the sitch and then into the back of the same stitch. 1 ST increased.
-K2tog - K two stitches together, 1 ST decreased.
-PM - place a marker SM - slip marker
-(RS) - right side of work (WS) - wrong side of work
-SL1 - slip one stitch purlwise from left needle to right needle.
-ST - stitch STS - Stitches
-W&T - wrap and turn. Slip one stitch, bring yarn to front, slip stitch back to left needle, turn work.
-Reconcile Wrapped Stitch - Slip the wrapped stitch to the right needle, insert the left needle into the wrap, slip the wrapped stitch back onto the left hand needle, and knit them both together as one stitch.
Needles US 2 (2.75mm) or size needed to obtain gauge.
Gauge 28 STS x 64 Rows (32 ridges) = 4” x 4” garter stitch. Adjust needle size to obtain correct gauge. Gauge is vital to ensure correct fit and coverage.
To Begin
-Cast on 36 STS using the long-tail cast on method.
-Knit 6 rows of garter stitch as follows: SL1, K to end. You will now be able to count 6 rows or 3 garter ridges. *Slipping the first stitch of the row will create a tidy finished edge and give less stretch on the sides of the mask.
-Place a stitch marker or progress keeper on the right hand side of the (RS) of work. Garter stitch is reversible, and keeping track of which side you are on may be confusing especially when working short rows. Always count rows (or ridges) from the right side of work.
Increase row:
-(RS) SL1, Kf/b to last ST, K. (70 STS)
-(WS) SL1, K 34, PM, K to end. (Marker placed at halfway point)
+++Work 10 rows of garter stitch as follows:-(RS) SL1, K to end. -(WS) SL1, K to end. You will now be able to count 10 rows or 5 garter ridges following the increase row.
Short Row Section 1:
Short rows will now be used to provide shaping. Your face isn’t flat, neither should your mask be.
-(RS) K to marker, SM, K1, W&T.-(WS) K to marker, SM, K1, W&T.
-(RS) K to wrapped ST, reconcile wrapped stitch, K2, W&T.
-(WS) K to wrapped ST, reconcile wrapped stitch, K2, W&T.
-Continue working short rows following the last two rows until 3 STS remain at the end of the row after the last (WS) W&T.
-(RS) K to wrapped ST, reconcile wrapped stitch, K3. (end of row.)
-(WS) K to wrapped ST, reconcile wrapped stitch, K3. (end of row.)
Center Point of Mask:
K two rows in garter stitch:
-(RS) SL1, K to end.
-(WS) SL1, k to end.
*Half of the mask is now complete. The second half is worked in exactly the same manner but in reverse.
Short Row Section 2:
-(RS) K to 3 STS before the end of row, W&T.
-(WS) K to 3 STS before the end of row, W&T.
-(RS) K to 4 STS before the last wrapped ST, (the wrapped stitch plus 3 stitches), W&T.
-(WS) K to 4 STS before the last wrapped ST, W&T.
-Continue working short rows following the last two rows until no more W&T’s can be completed at the center marker.
-(RS) After the last W&T, K to end of row, reconciling wrapped stitches as encountered.
-(WS) SL1, K to end of row, reconciling wrapped stitches as encountered.

+++Work 10 rows of garter stitch as follows:
-(RS) SL1, K to end.
-(WS) SL1, K to end.
You will now be able to count 10 rows or 5 garter ridges following the last short row section.
Decrease Row:
-(RS) SL1, (K2tog) to last ST, K1. (Back to original 36 STS)
-(WS) SL1, K to end.
-Knit 6 rows of garter stitch as follows: SL1, K to end.
You will now be able to count 6 rows or 3 garter ridges after the decrease row.
-Bind off all STS. Do not break yarn.
+++The height of the mask may be adjusted by adding or subtracting garter rows in these sections. Be sure to add or subtract the same number of rows in both halves of the mask.
Ear Loops:
Ear loops may be made in several ways. Every face has a different size and shape, so adjust ear loops to fit.
Crochet
If you crochet, this is probably the easiest way to customize the fit. With working yarn still attached, work in chain stitch for approximately 7 inches. Attach the chain to the lower corner of the mask, try it on for fit and adjust chain if necessary, and work the same number of single crochet stitches AROUND the chain. Attach to the chain point of origin on the body of the mask to reinforce. Break yarn, pull tail through loop, weave in end. Repeat for the second ear loop.
I-cord
With working yarn still attached, pick up three stitches along the side of the mask.
4 STS total. Work I-cord for approximately 7 inches. Break yarn. Pull tail through all loops and attach to the lower corner of the mask.
Opposite side: Pick up 4 STS at the top corner of the mask and repeat as other side.
Elastic
Cut two 6 1/2“ - 7” pieces of ¼” elastic and hand stitch to the corners of the mask.
The CDC has recommended that we all wear masks when going out in public. I’ve linked it here again in case you missed the one at the beginning of this post. Click on this button to read their recommendations directly from their website.
LINING
Lining supplies:
-Pencil, paper, and a ruler for drafting the pattern.
-cotton cloth.
-fusible interfacing
-iron and ironing board
-needle and thread. *The center front seam may be hand-stitched, but a sewing machine would make life easier.
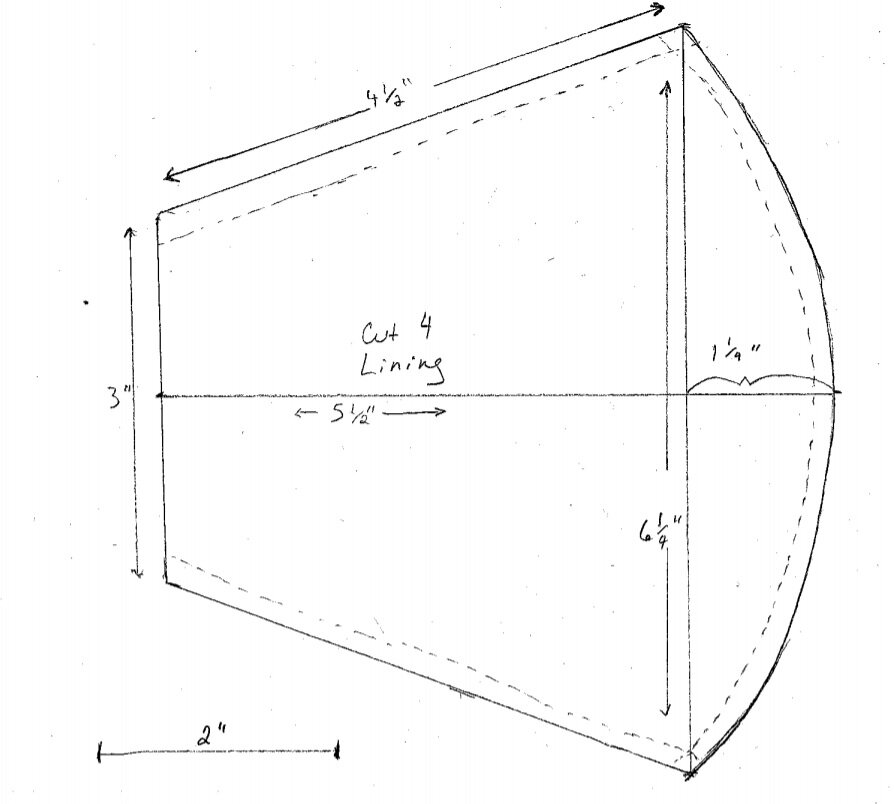
1) Draft your own copy of the above lining pattern using the measurements provided.
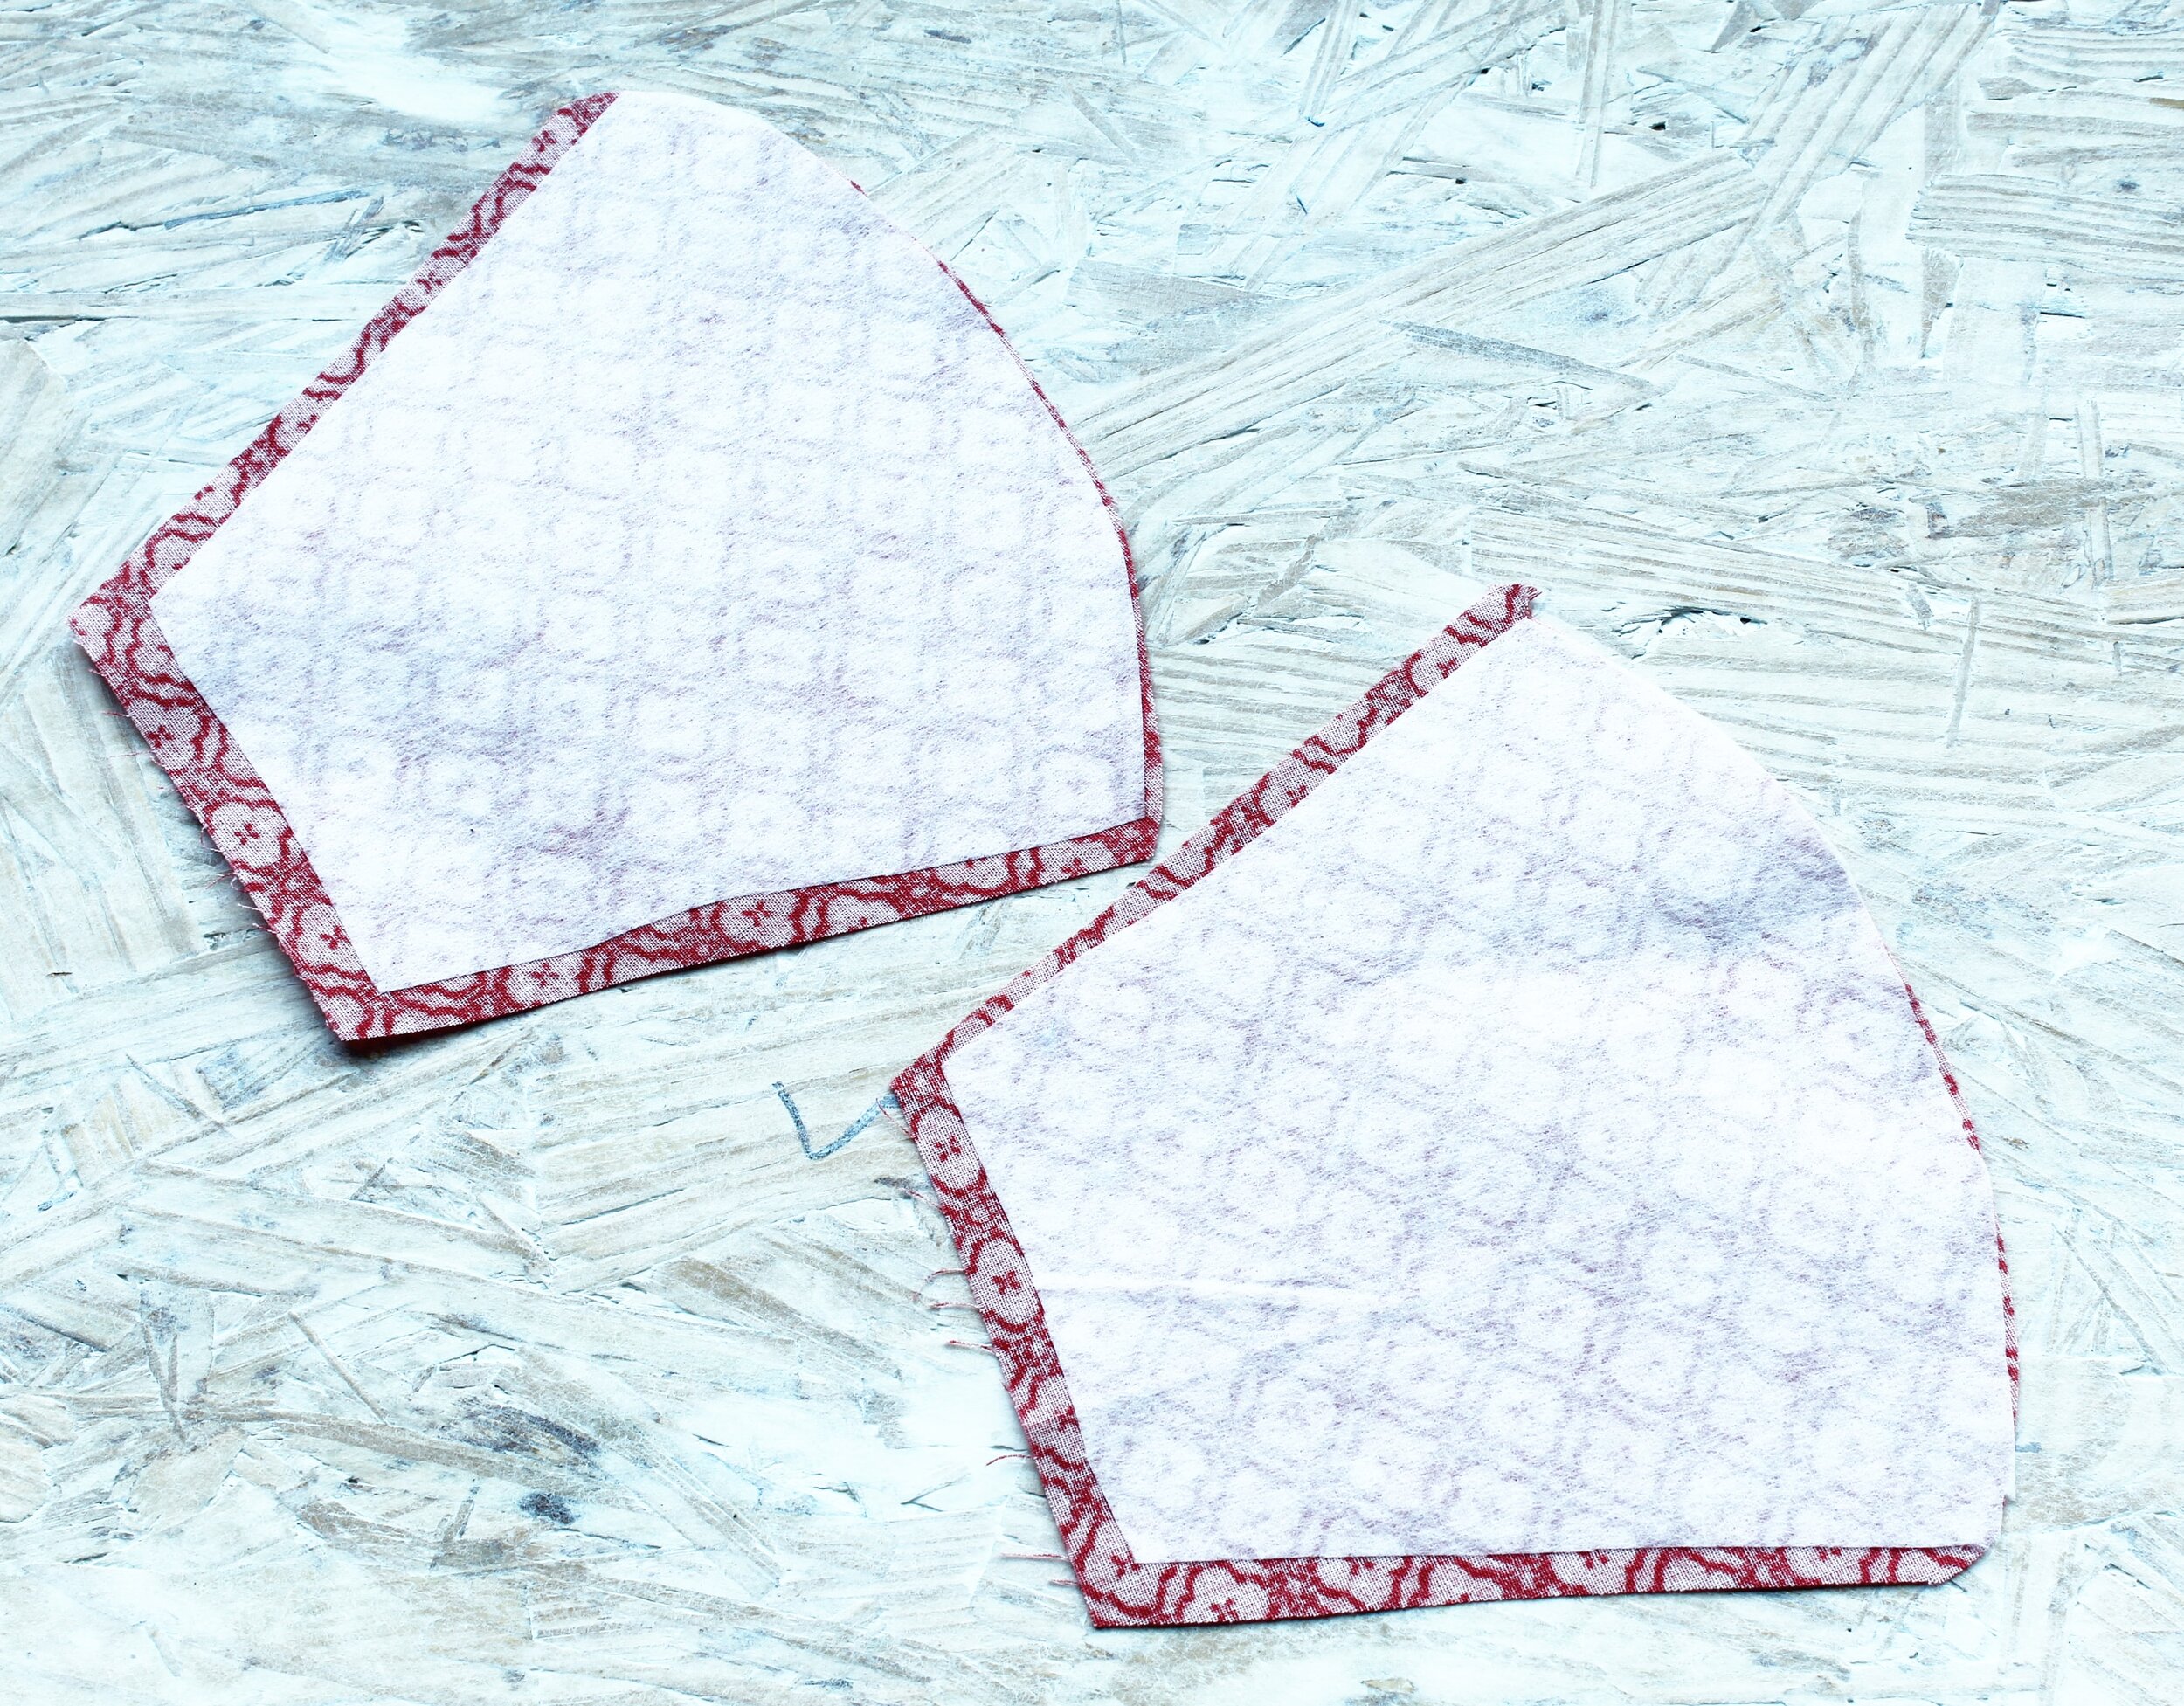
2) Cut 2 lining pieces from cotton cloth, and cut 2 lining pieces from heavy fusible interfacing.
3) Trim 1/4” from the top, bottom, and lateral edges of the interfacing, and iron the interfacing onto the wrong side of lining pieces as shown.
*You may also cut four pieces of cotton instead interfacing if you don’t have access to interfacing. If so, sew the center front seams of each lining pair, then stack them together wrong sides facing and baste the two layers together.
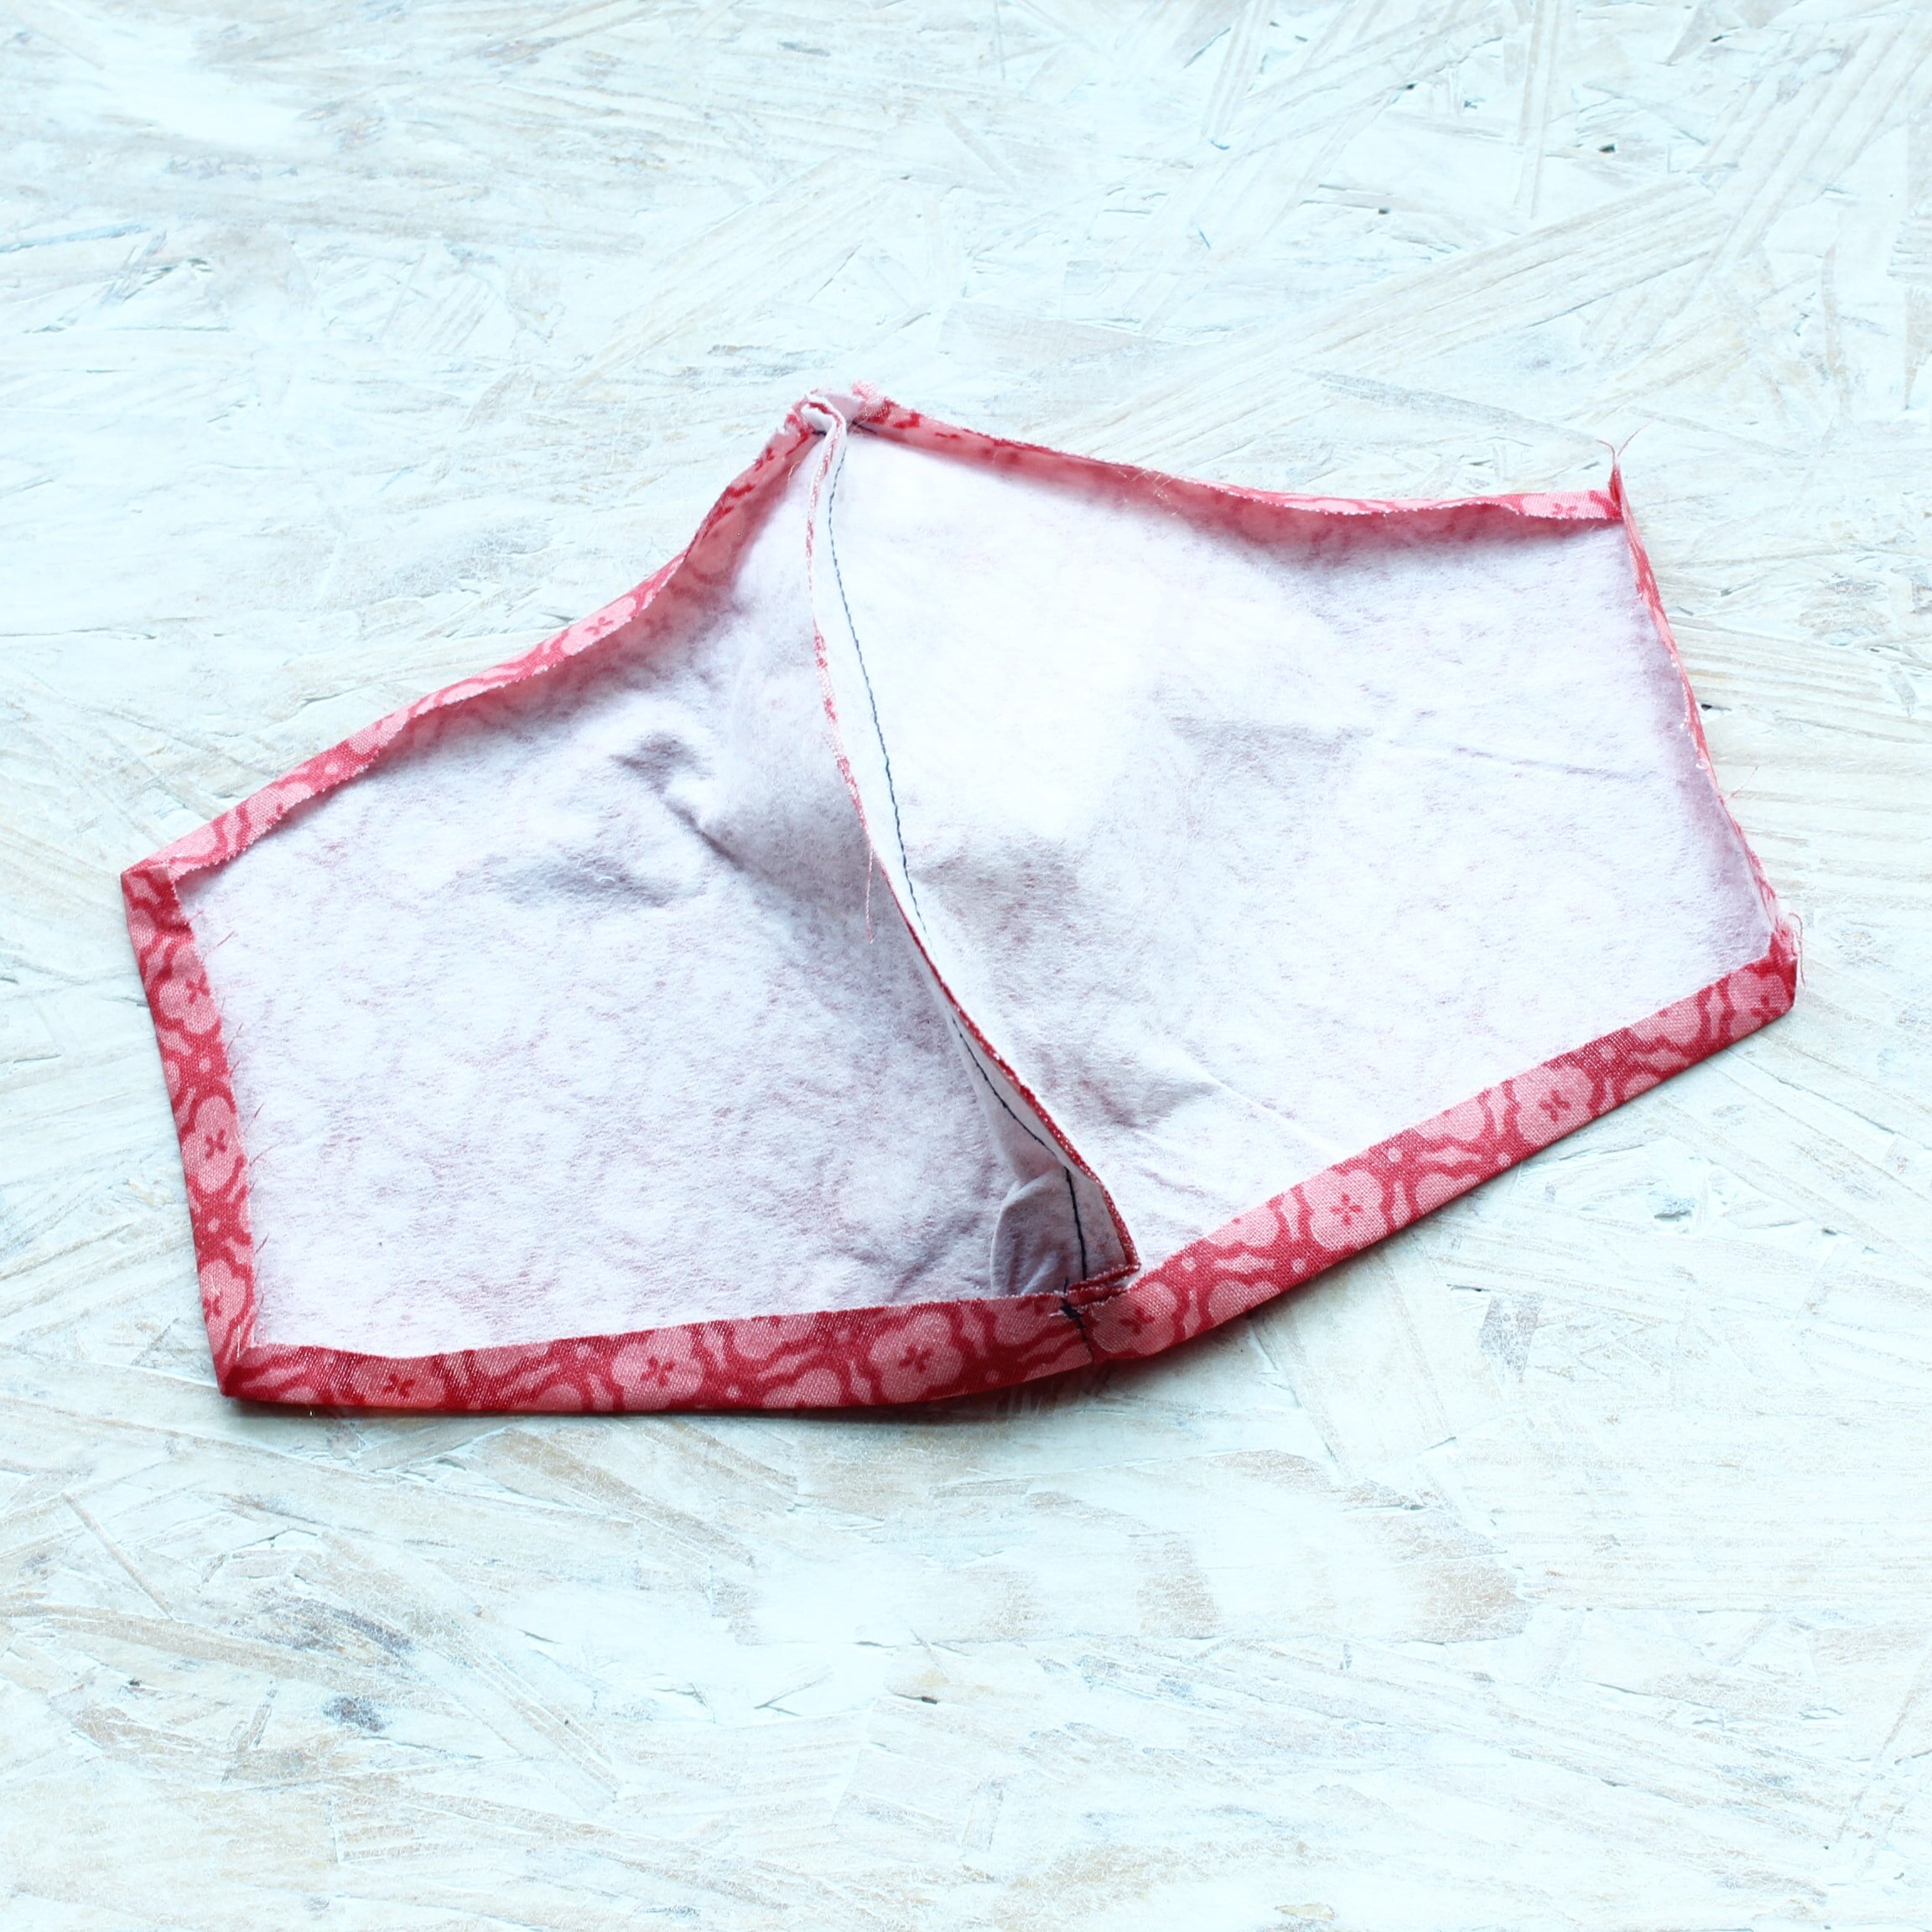
4) Sew lining center front seam, right sides together. 1/4” seam allowance.
5) Fold and press edges 1/4”.
6) Fold and press lateral edges an additional 1/2”. (not pictured)
7) Open center seam and press.
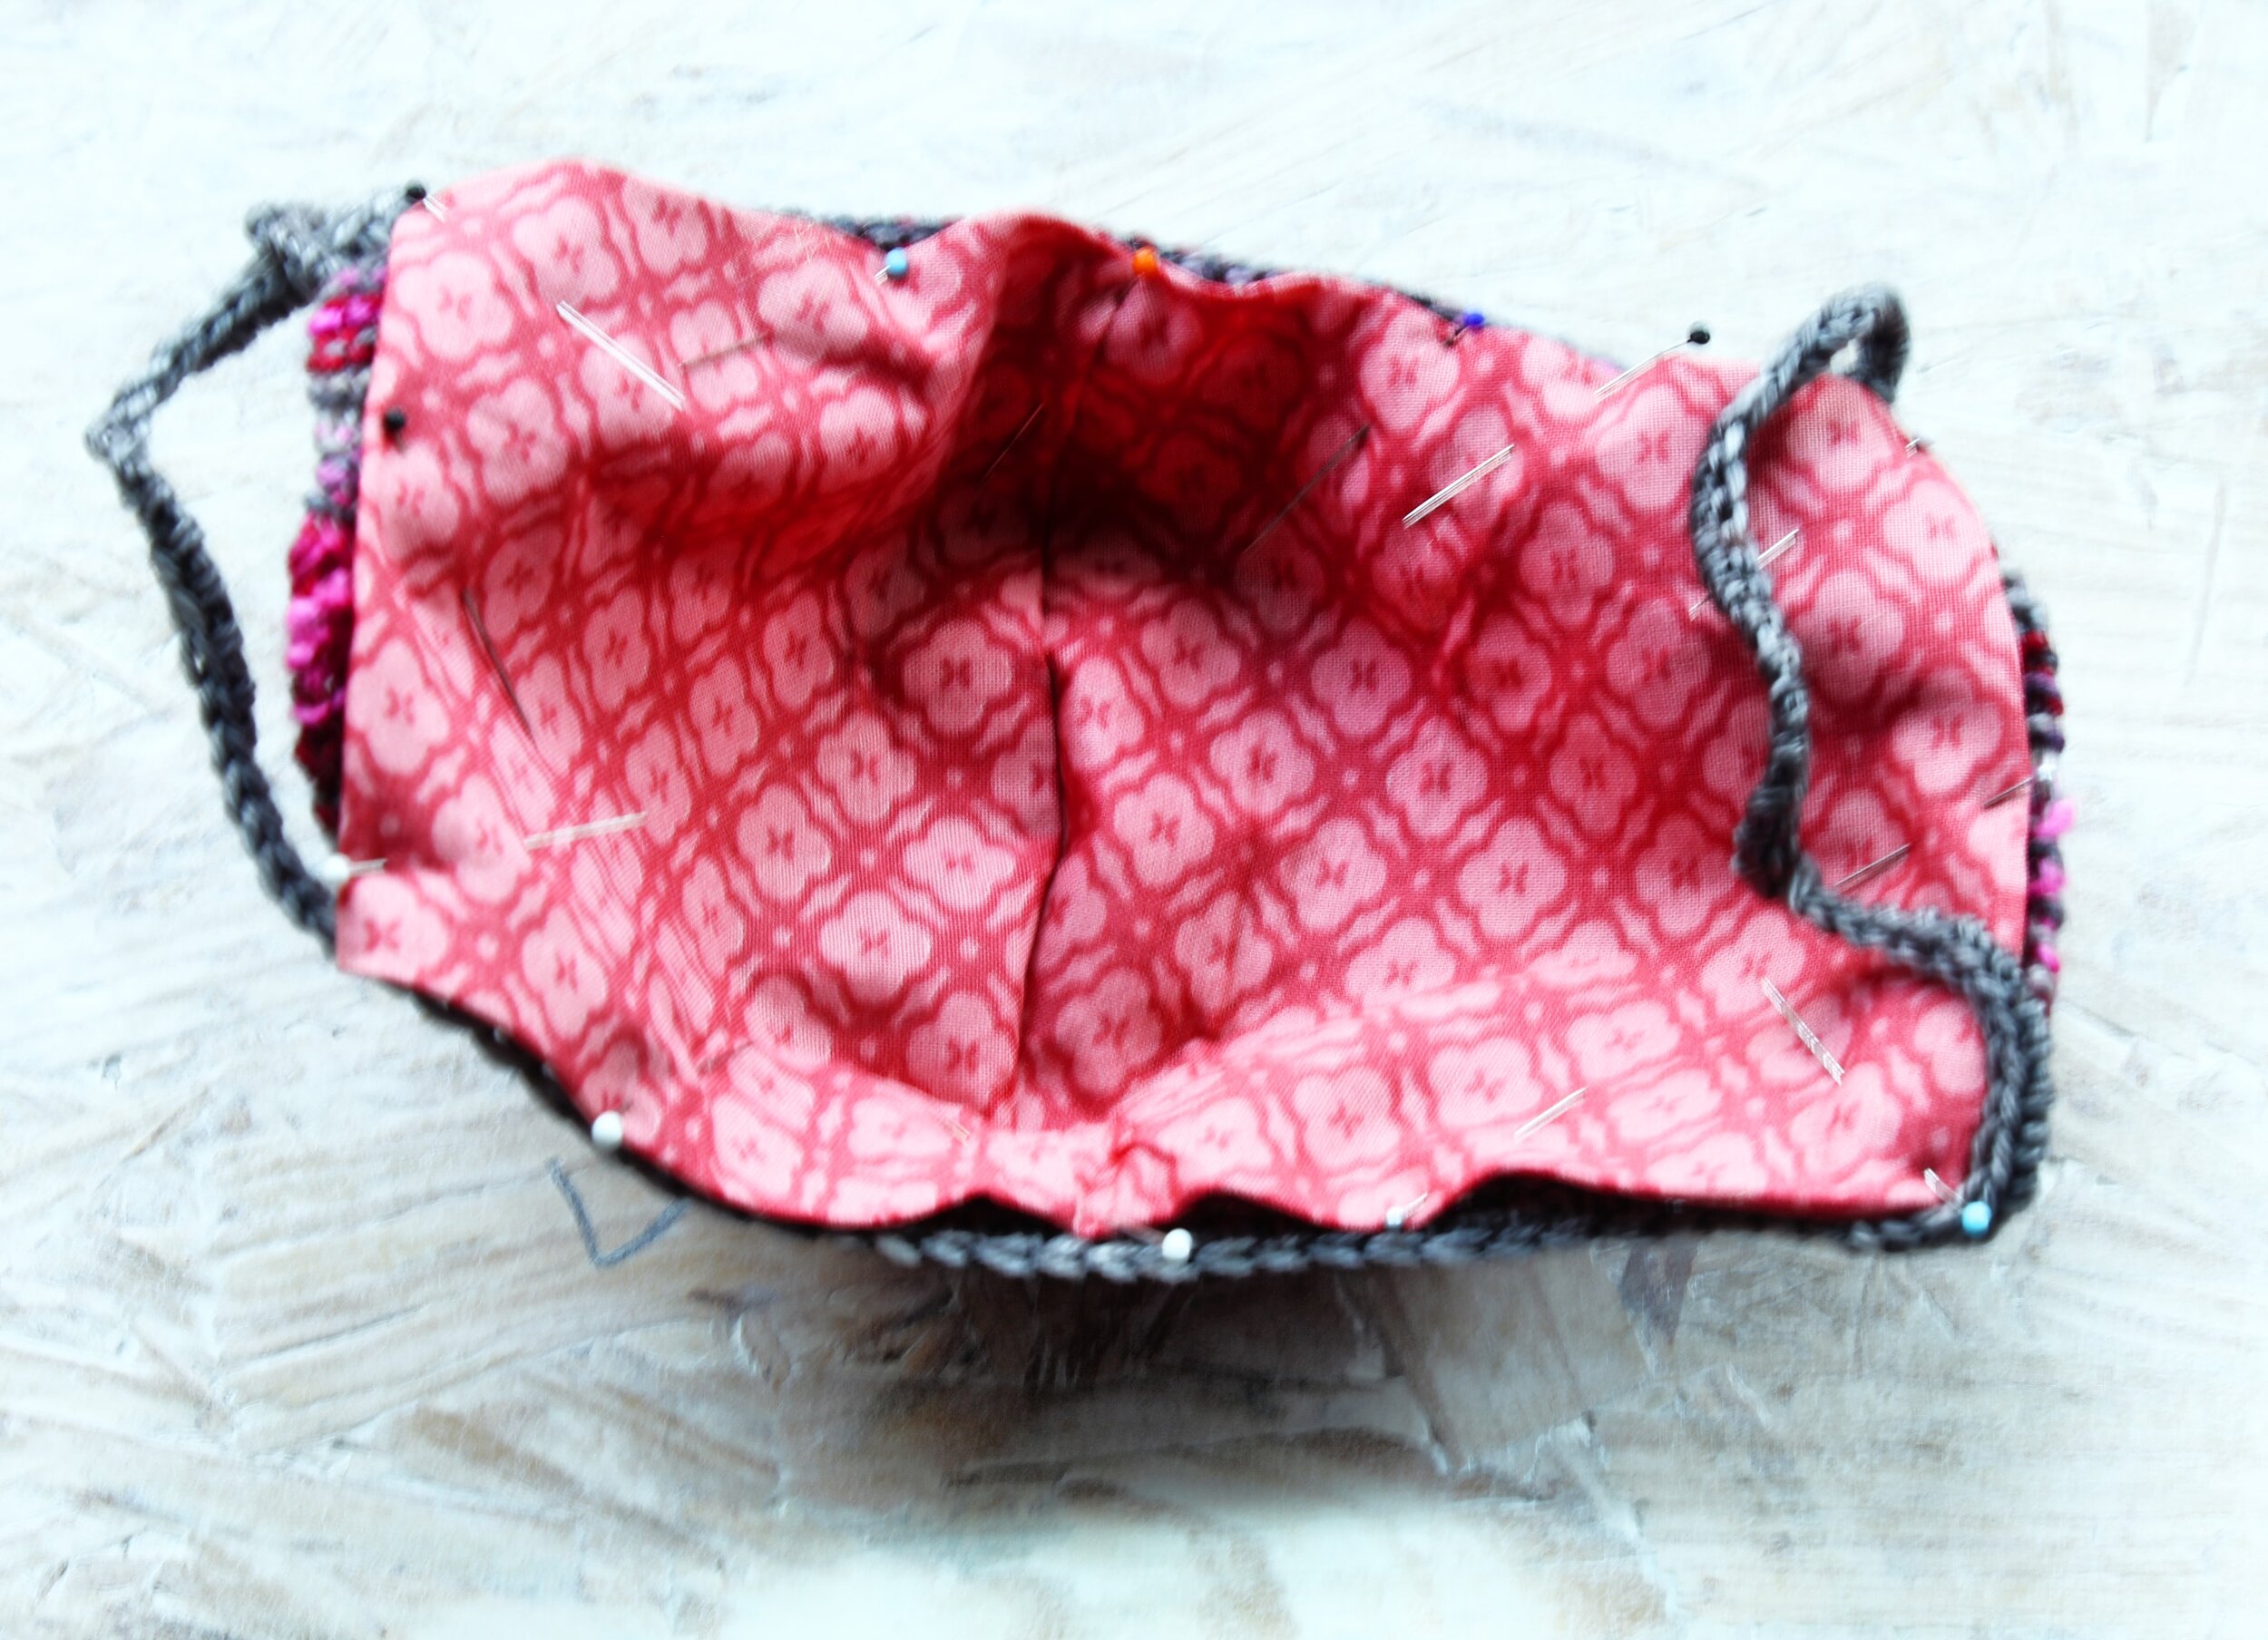
8) Carefully pin the lining to the inside of the mask, wrong sides together, starting at top and bottom center and then corners. Stretch the mask to fit the lining.
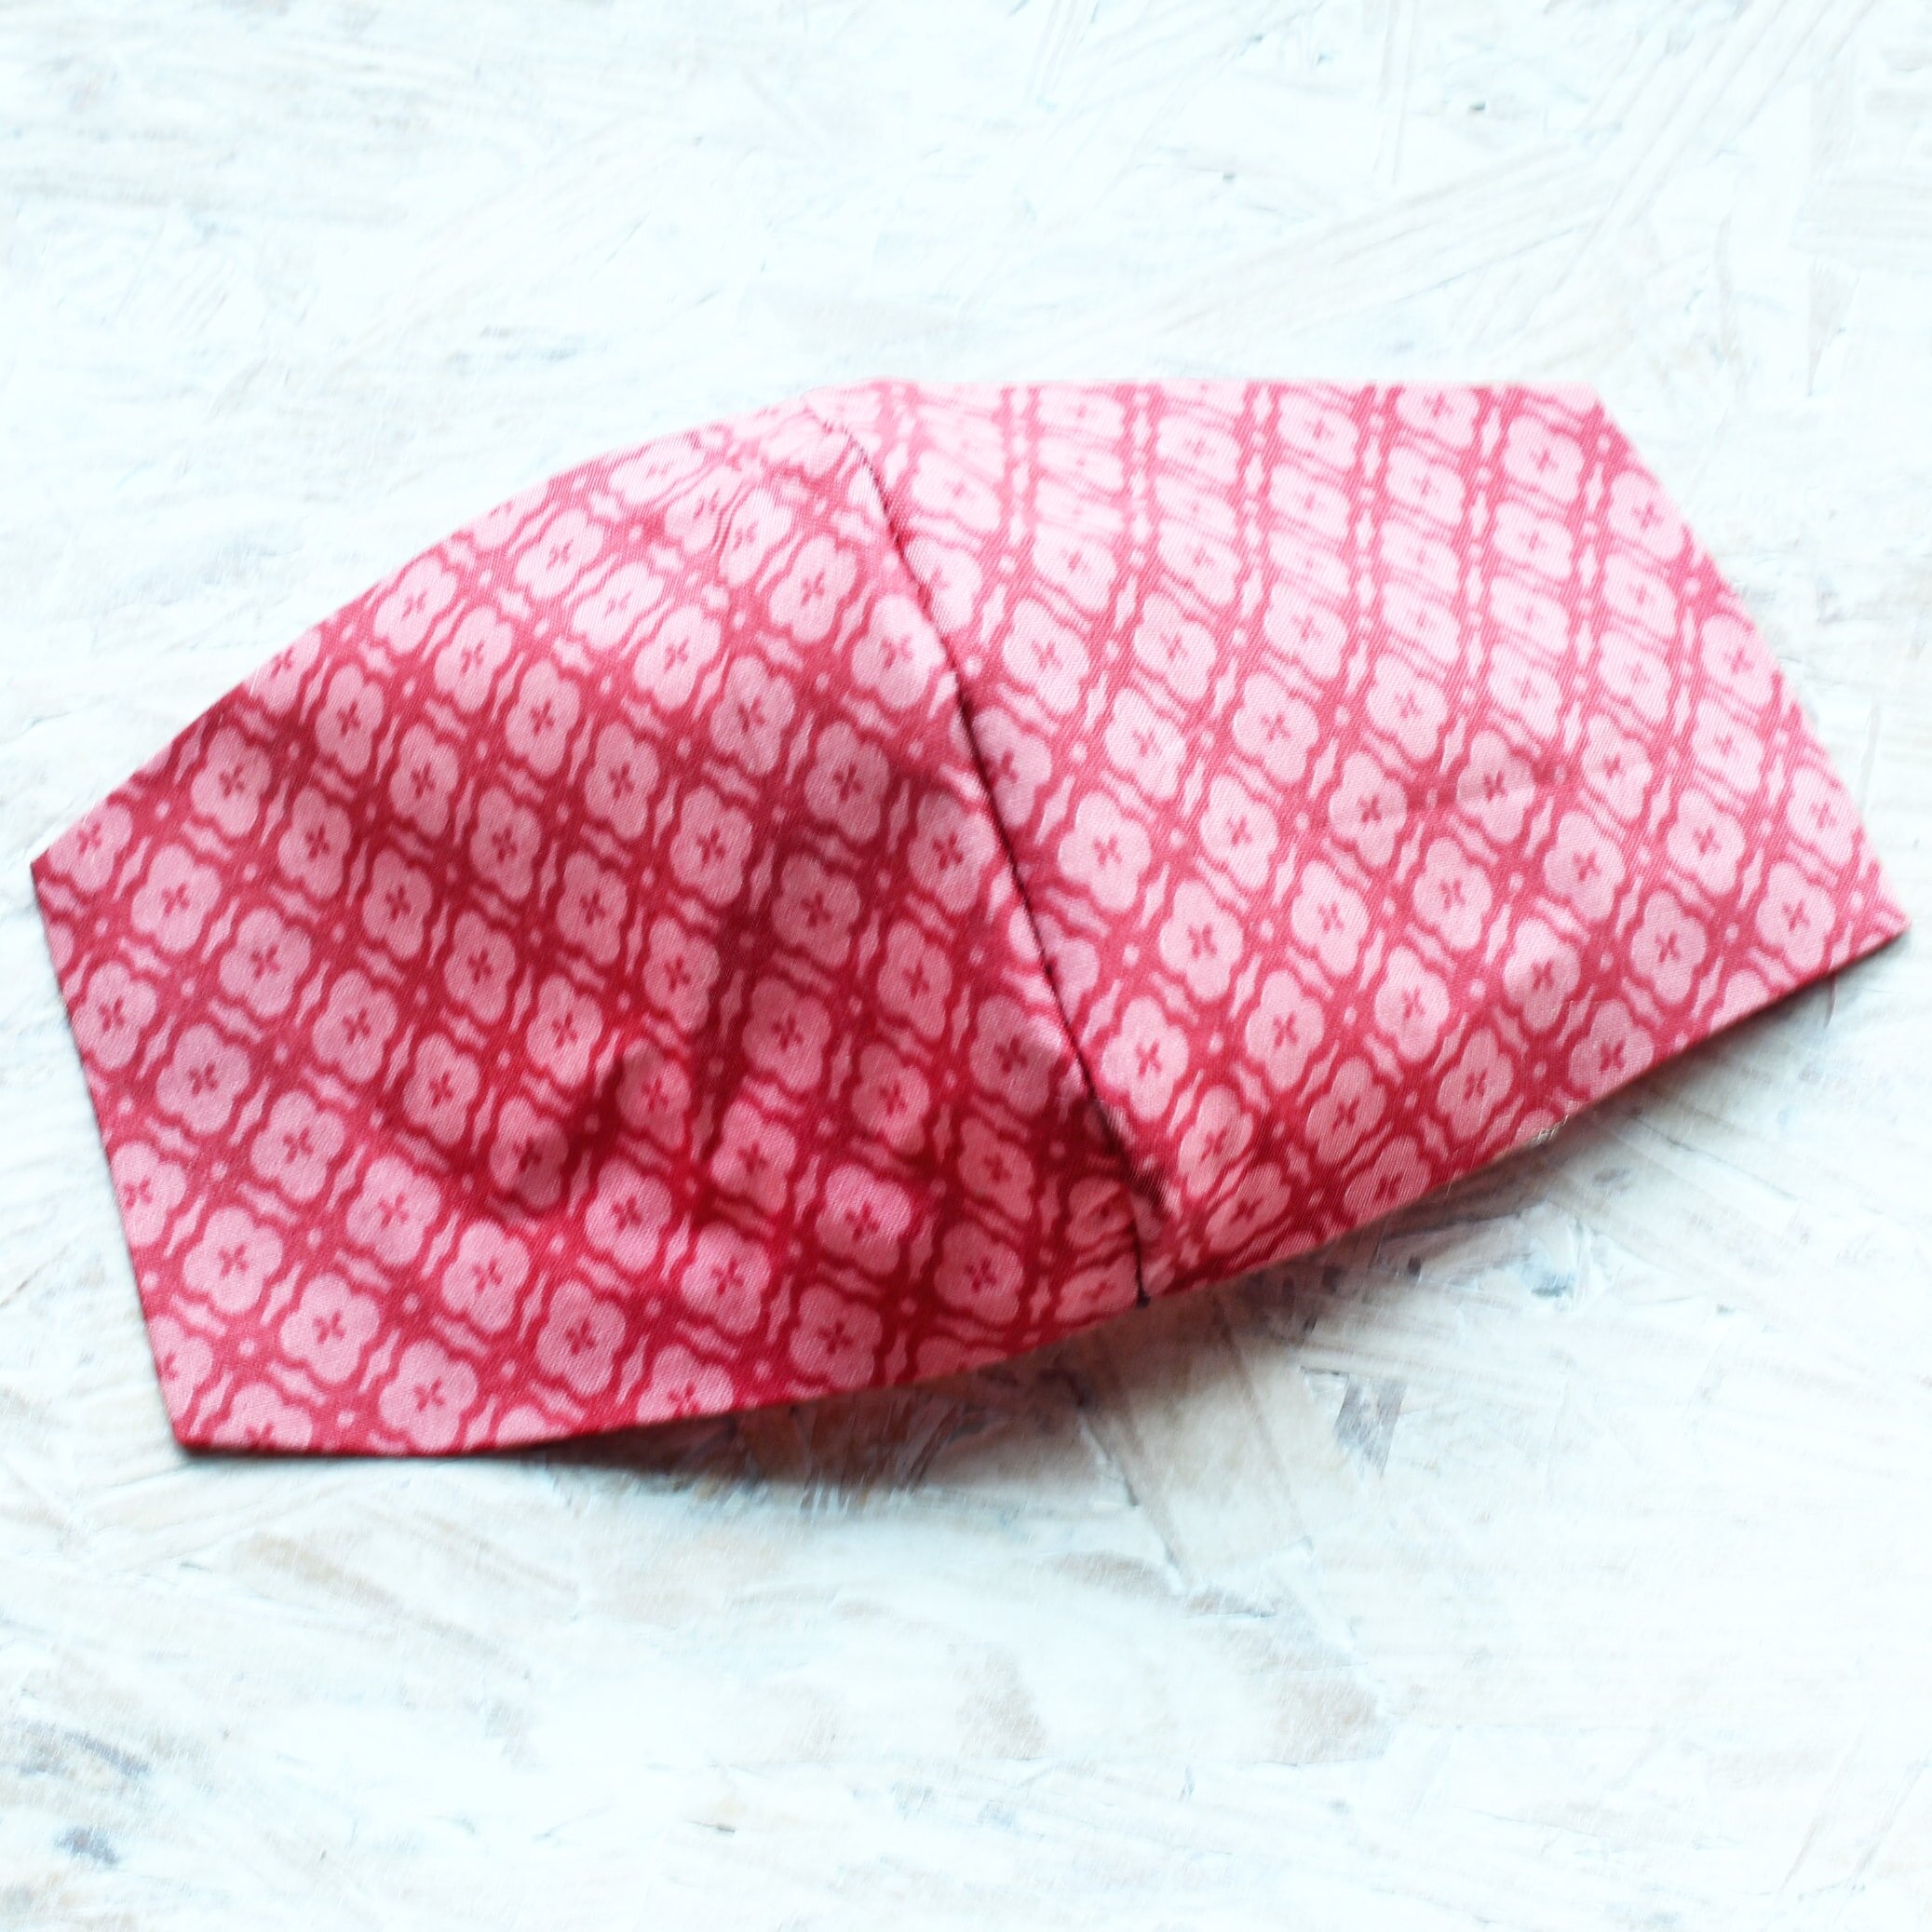
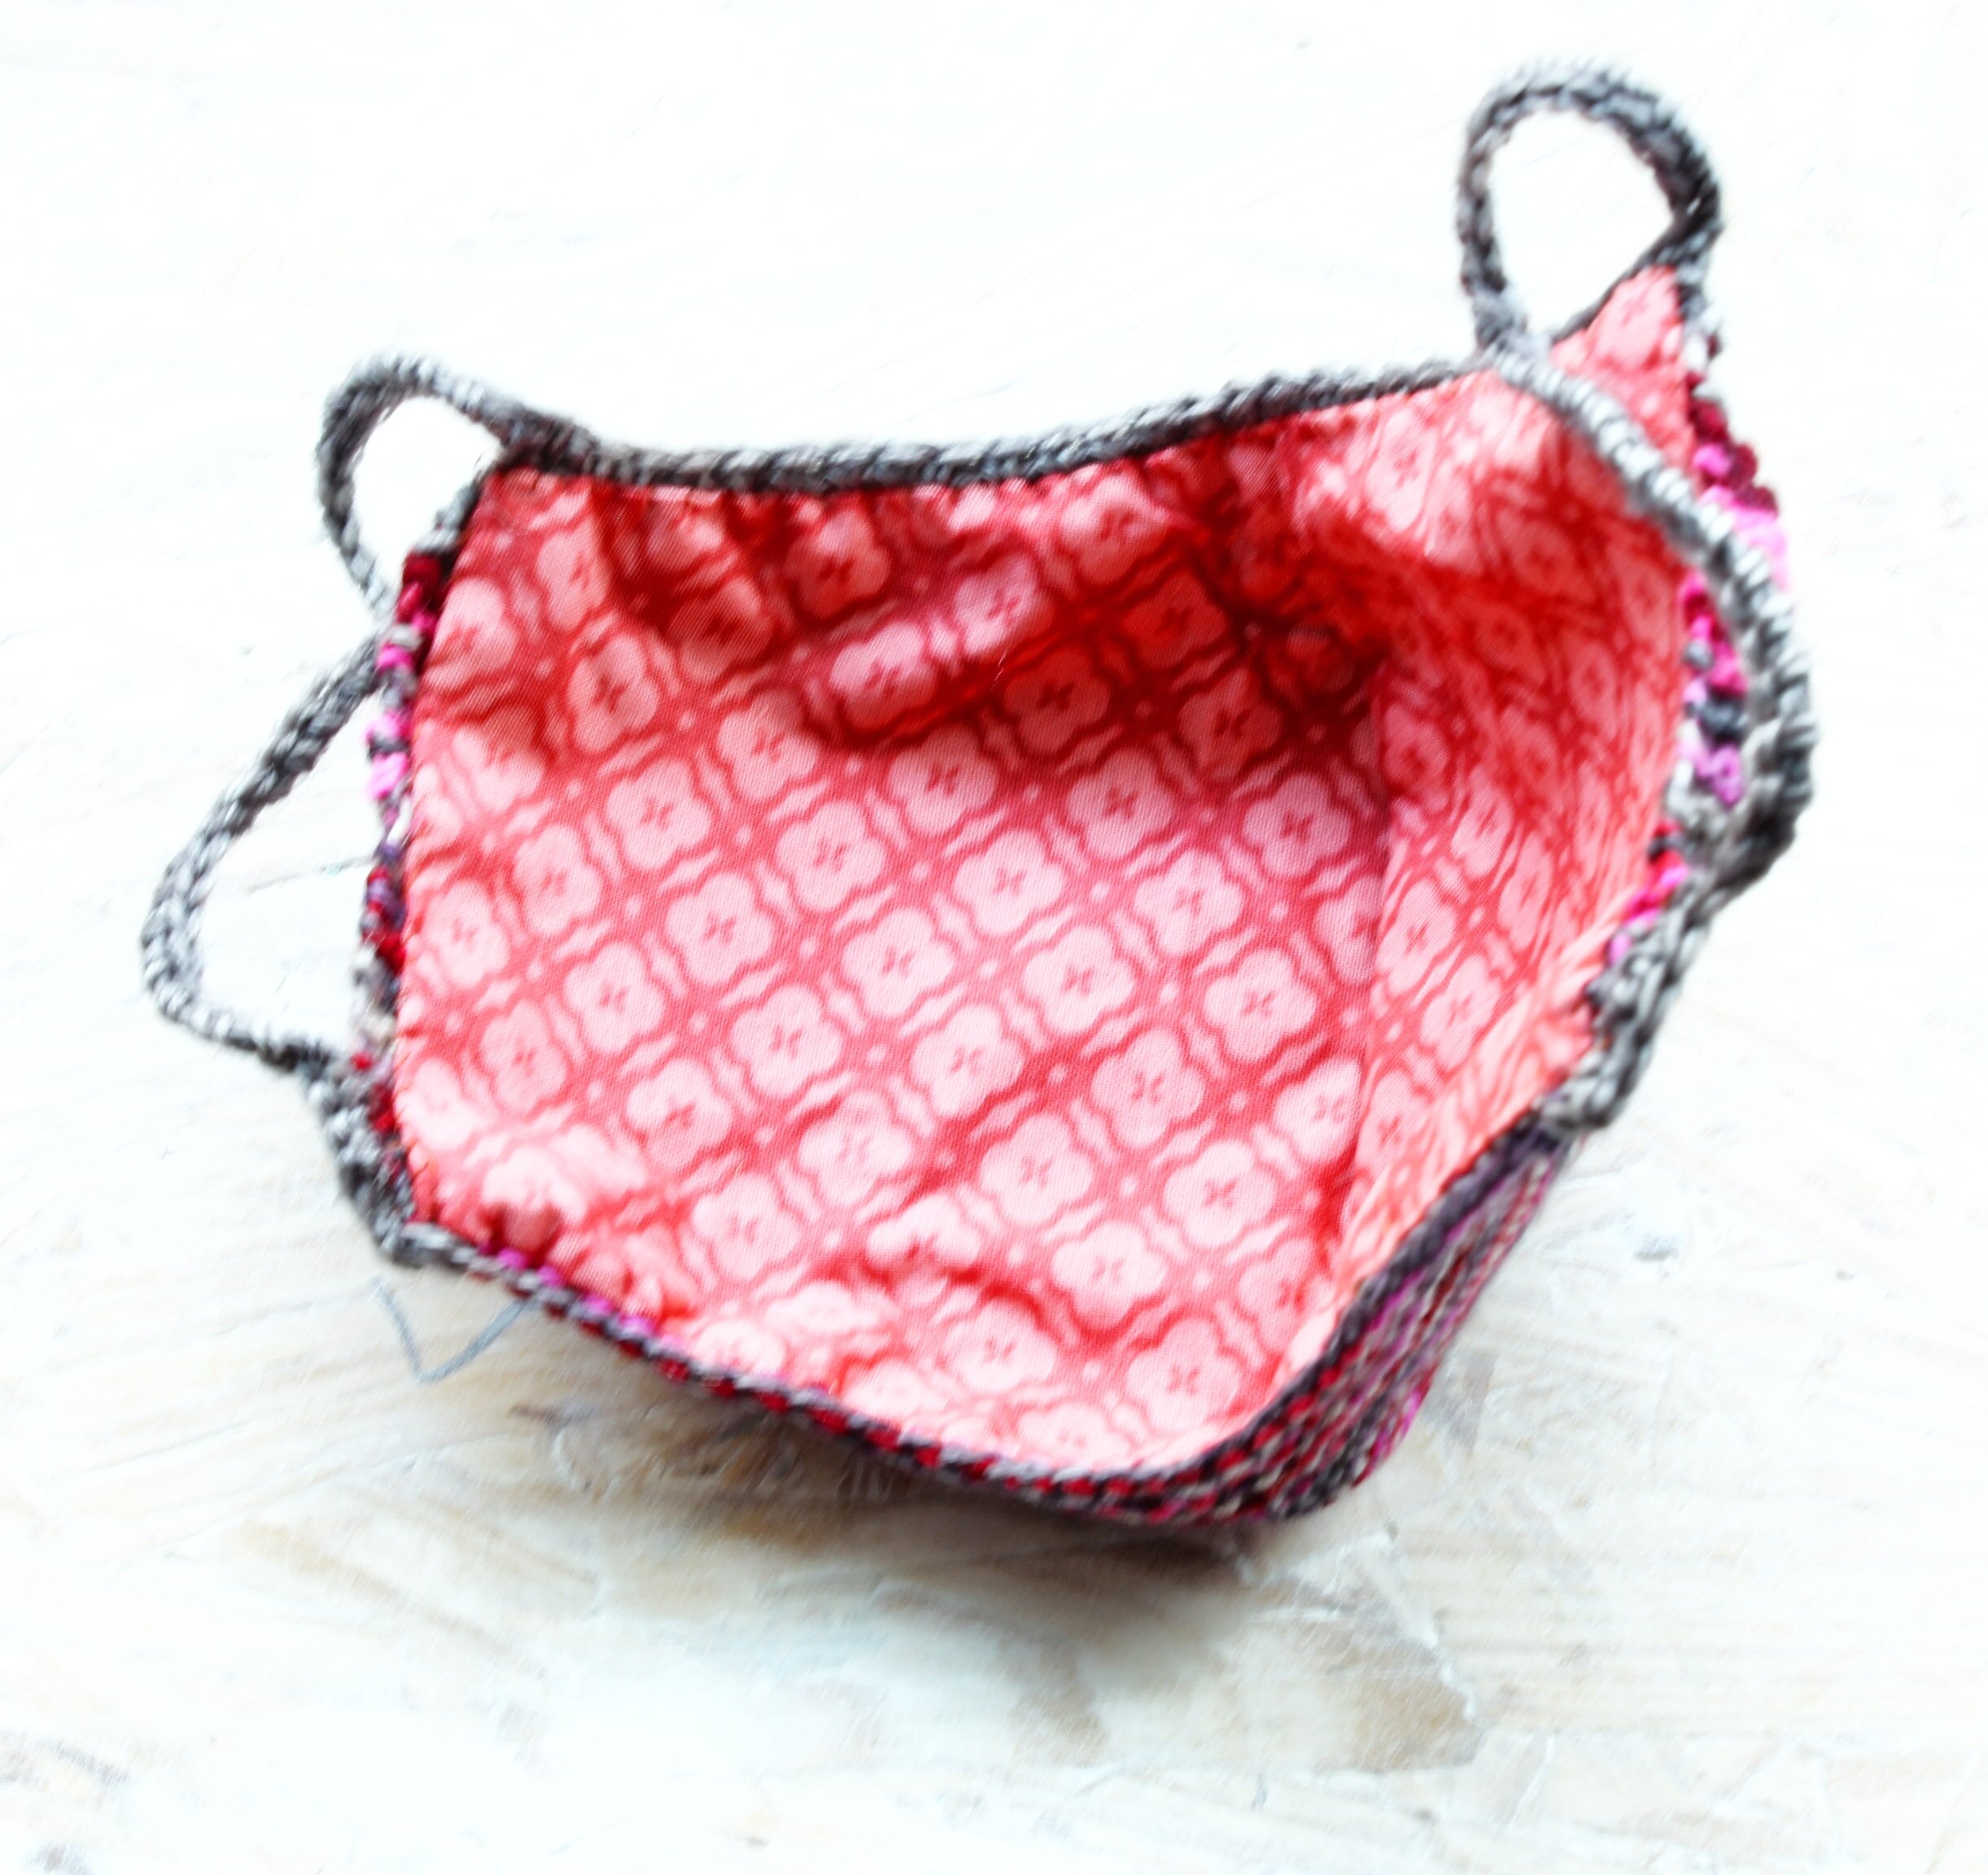
9) Hand-stitch the lining to the mask as shown.
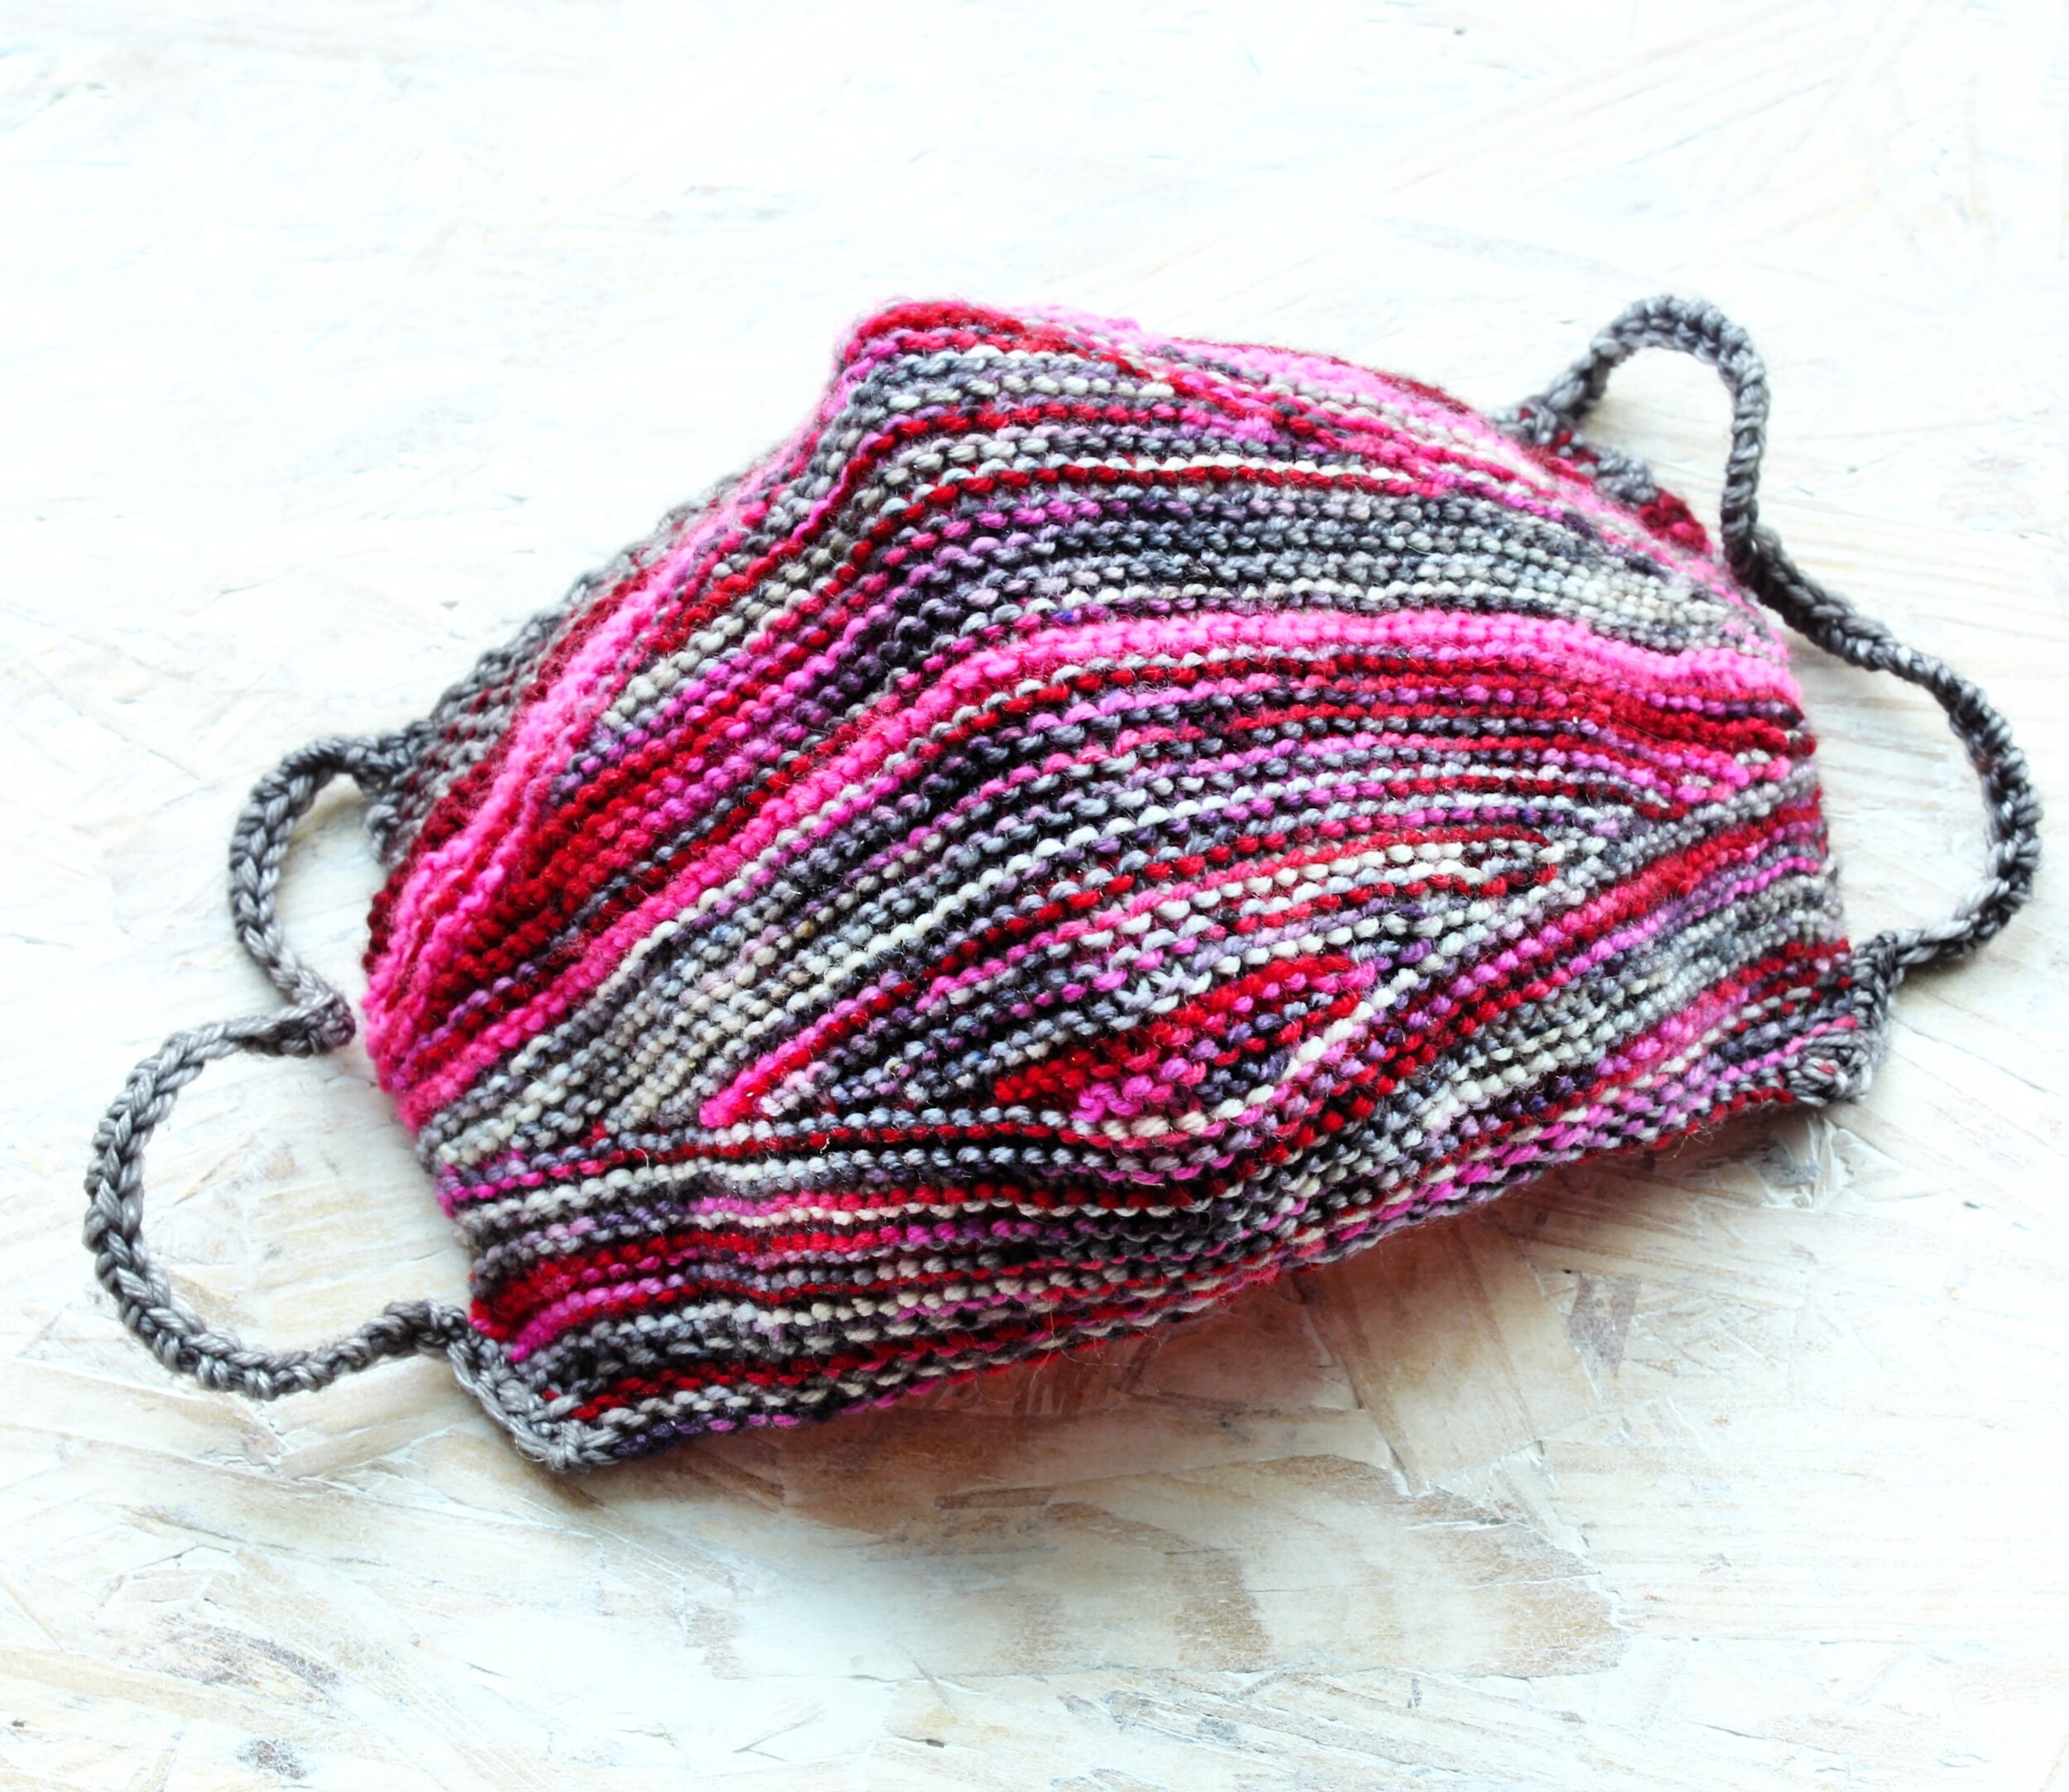
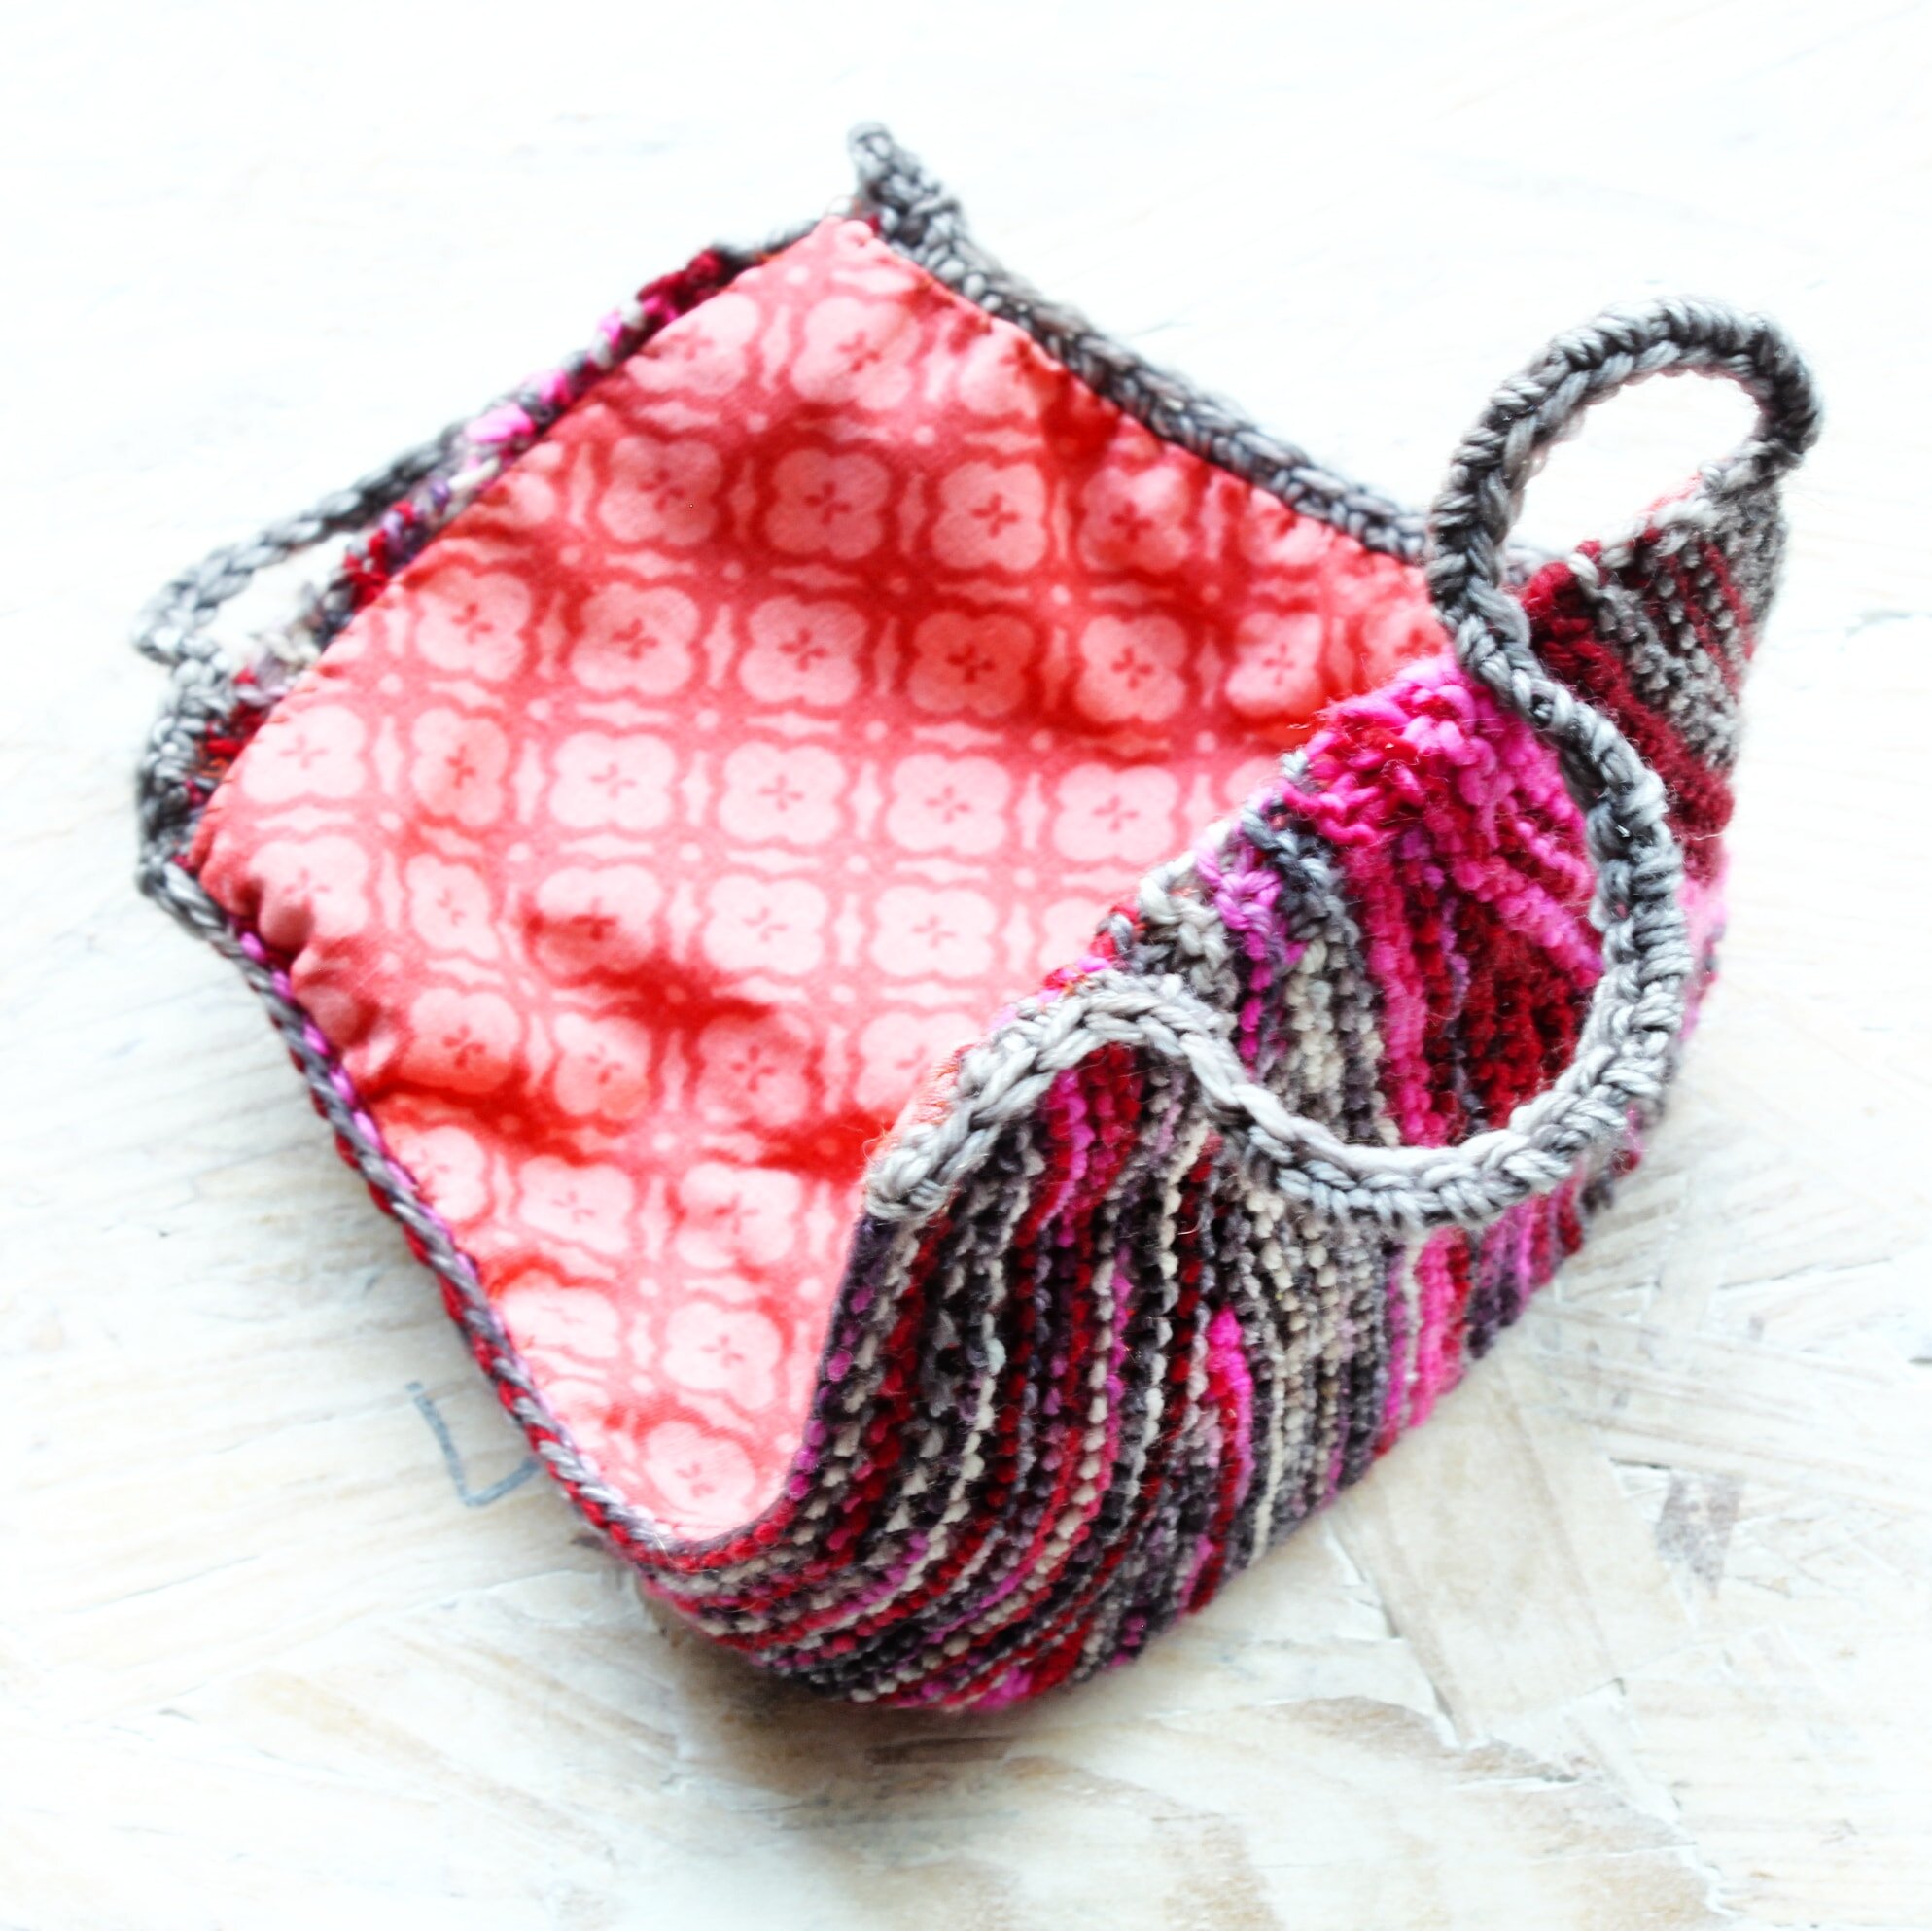
10) Finished mask.
-The use of interfacing will give your finished mask body and stability.
Click on the button below for more makeable mask ideas from our friends at Happy DIY Home.
Stay safe and stay kind!